
Indulging in the joy of making your own treats has never been easier with this Homemade Reese’s Cups Recipe. These delightful bites are perfect for any occasion, from birthday parties to cozy movie nights. With a simple blend of creamy peanut butter and rich chocolate, you can create a nostalgic dessert that brings a smile to everyone’s face. Plus, they’re easy to customize, ensuring a unique touch every time!
Why You’ll Love This Recipe
- Easy to Make: This recipe requires minimal ingredients and straightforward steps, making it beginner-friendly.
- Irresistible Flavor: The combination of smooth peanut butter and rich chocolate is a classic favorite.
- Versatile Treat: Perfect for special occasions or just a sweet ending to your day; these cups fit any event.
- Customizable: Feel free to add toppings like sea salt or crushed nuts for an extra flourish.
- Fun Activity: Making these cups can be a great way to bond with family or friends in the kitchen.
Tools and Preparation
Before diving into the deliciousness of homemade Reese’s cups, gather your tools and equipment. Having everything ready will make the process smoother and more enjoyable.
Essential Tools and Equipment
- Muffin tin
- Cupcake liners
- Microwave-safe bowl
- Mixing bowl
- Mixing spoon
Importance of Each Tool
- Muffin tin: Essential for shaping your cups perfectly and providing even cooking.
- Cupcake liners: Help in easy removal of the cups once set, preventing mess during serving.
Ingredients
Indulge in the nostalgic bliss of homemade Reese’s cups, capturing the perfect blend of creamy peanut butter and rich chocolate for an unforgettable treat.
For the Chocolate Base
- 14 ounces semi-sweet chocolate chips, divided in half
For the Peanut Butter Filling
- 1 cup creamy peanut butter
- 6 tablespoons powdered sugar
- 4 tablespoons butter, softened
How to Make Homemade Reese’s Cups Recipe
Step 1: Melt the Chocolate
- Melt half the chocolate chips in a microwave-safe bowl.
- Heat in 30-second intervals, stirring each time until smooth.
Step 2: Prepare the Cupcake Liners
- Spoon about ½ tablespoon of melted chocolate into each cupcake liner.
- Shake the muffin tin gently to spread the chocolate evenly.
Step 3: Freeze the Chocolate Base
- Place the muffin tin in the freezer for about 15 minutes until set.
Step 4: Make the Peanut Butter Filling
- In a mixing bowl, beat together 1 cup creamy peanut butter, 6 tablespoons powdered sugar, and 4 tablespoons softened butter until smooth and creamy.
Step 5: Add Peanut Butter Filling
- Spoon 1 tablespoon of this mixture onto each chocolate base.
- Ensure that the filling is centered over each cup.
Step 6: Freeze Again
- Return to freezer for an additional 5 minutes.
Step 7: Cover with Remaining Chocolate
- Melt the remaining chocolate chips as before.
- Spoon it over each peanut butter layer, covering completely.
Step 8: Final Freeze
- Freeze for another 10 to 15 minutes or refrigerate for 15 to 20 minutes until fully set.
Step 9: Serve Your Homemade Reese’s Cups
- Once set, remove from freezer and peel off cupcake liners carefully.
- Arrange them on a platter and sprinkle some sea salt on top before serving for extra flair!
How to Serve Homemade Reese’s Cups Recipe
Homemade Reese’s cups are a delightful treat that can be enjoyed in various ways. Whether you’re hosting a party or simply indulging yourself, these serving suggestions will elevate your experience.
With a Glass of Milk
- A classic pairing, the creamy texture of milk complements the rich chocolate and peanut butter perfectly.
On a Dessert Platter
- Arrange the cups on a colorful platter with fruits and other candies for an eye-catching dessert display.
As a Party Favor
- Wrap each cup in decorative foil and present them as sweet party favors for guests to take home.
With Ice Cream
- Serve your homemade Reese’s cups alongside a scoop of vanilla ice cream for an indulgent dessert combo.
In a Brownie Sundae
- Chop the cups into smaller pieces and sprinkle over brownies topped with chocolate sauce and whipped cream for added flavor.
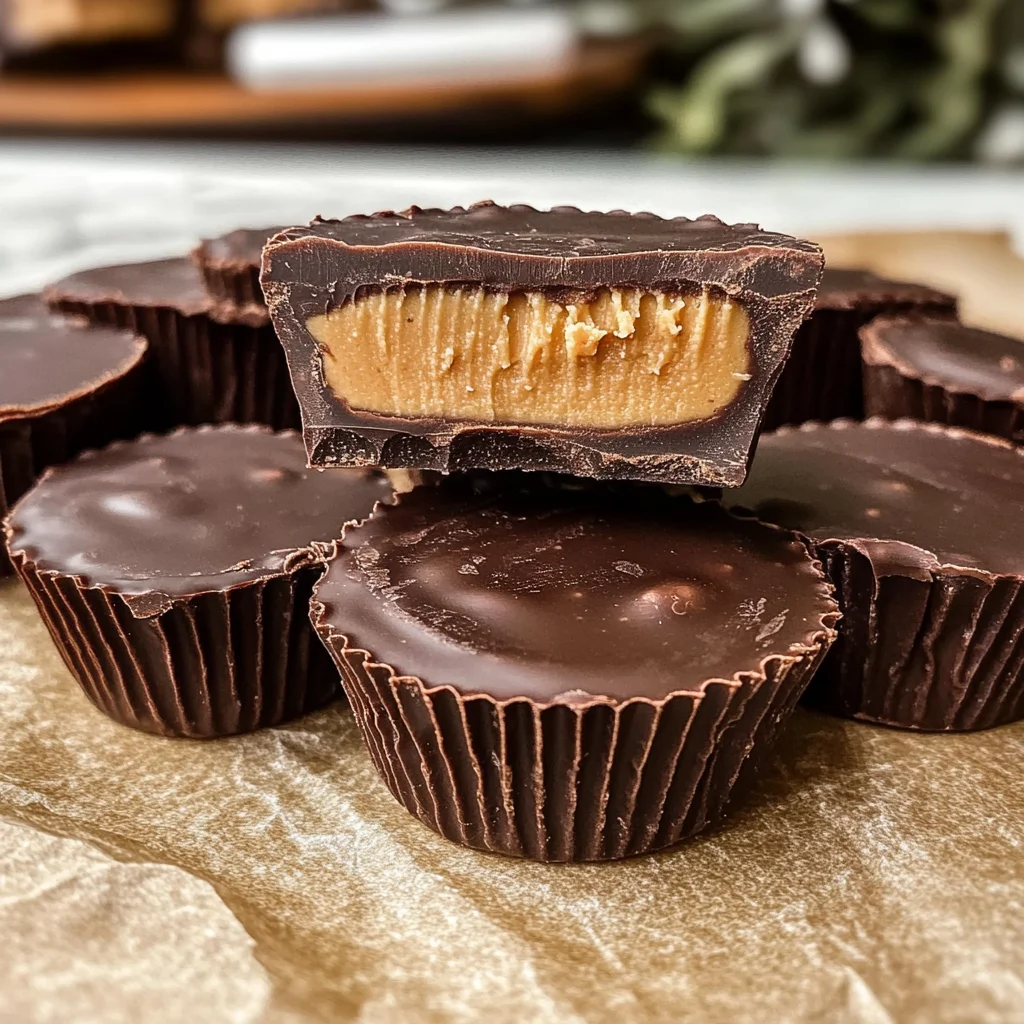
How to Perfect Homemade Reese’s Cups Recipe
Creating the perfect homemade Reese’s cups requires some attention to detail. Here are some tips to ensure your treats turn out delicious every time.
- Use quality chocolate: The flavor of your cups largely depends on the chocolate. Opt for high-quality semi-sweet chocolate chips for a richer taste.
- Chill between layers: Make sure to freeze each layer before adding the next. This helps create distinct layers and prevents mixing.
- Measure ingredients accurately: Precision is key in baking. Use measuring cups and spoons to ensure you get the right amounts of peanut butter and sugar.
- Experiment with fillings: Try adding crushed nuts or different flavors of chocolate for unique twists on the classic recipe.
Best Side Dishes for Homemade Reese’s Cups Recipe
Pairing side dishes with your homemade Reese’s cups can enhance your dessert experience. Here are some tasty options that complement the flavor beautifully.
- Fresh Fruit Salad
A mix of berries, melons, and citrus adds freshness that balances the richness of the peanut butter cups. - Chocolate Chip Cookies
Classic cookies provide additional sweetness and pair well with the flavors in your homemade treats. - Vanilla Ice Cream
Creamy vanilla ice cream makes an excellent contrast to the rich chocolate and peanut butter, creating a delightful combination. - Whipped Cream Topping
A dollop of whipped cream on top adds extra creaminess and can be flavored with vanilla or cocoa powder. - Peanut Butter Sandwiches
Simple peanut butter sandwiches offer a nostalgic touch that echoes the main ingredient in your homemade cups. - Caramel Sauce Drizzle
A drizzle of warm caramel sauce over your dessert can add an extra layer of sweetness that enhances every bite.
Common Mistakes to Avoid
Creating your own homemade Reese’s cups is fun and rewarding, but it’s easy to make some common mistakes. Here are a few to watch out for:
- Using the wrong type of chocolate: Always use semi-sweet chocolate chips for the best taste and texture. Milk chocolate can be too sweet and alter the flavor balance.
- Not melting chocolate properly: Melting chocolate too quickly can cause it to seize. Always melt in short intervals and stir frequently to ensure smoothness.
- Overfilling the cups: It’s tempting to add more peanut butter filling, but overfilling can lead to messy treats. Stick to the recommended amounts for perfect cups.
- Skipping the freezing steps: Freezing each layer is crucial for proper setting. Don’t skip these steps, as they help create distinct layers and improve texture.
- Not letting them cool completely before serving: If you serve them too soon, the chocolate may still be soft. Make sure they have fully set in the fridge or freezer first.
Storage & Reheating Instructions
Refrigerator Storage
- Store homemade Reese’s cups in an airtight container.
- They can last in the refrigerator for up to 1 week.
Freezing Homemade Reese’s Cups Recipe
- For longer storage, place them in a freezer-safe container.
- They will stay fresh for up to 3 months in the freezer.
Reheating Homemade Reese’s Cups Recipe
- Oven: Preheat to 350°F (175°C) and place cups on a baking sheet for a few minutes until slightly warm.
- Microwave: Heat on low power for about 10-15 seconds; be careful not to melt them too much.
- Stovetop: Place in a pan over low heat just until warmed through, stirring occasionally.
Frequently Asked Questions
What is the best type of chocolate for this Homemade Reese’s Cups Recipe?
For this homemade recipe, semi-sweet chocolate chips provide the best flavor and texture balance. You can also use dark chocolate if you prefer a richer taste.
Can I customize my Homemade Reese’s Cups Recipe?
Absolutely! You can experiment with different nut butters like almond or cashew butter, or even add toppings like crushed nuts or sea salt for extra flavor.
How should I store my Homemade Reese’s Cups?
Store them in an airtight container in the refrigerator for up to a week or freeze them for up to three months.
Is this Homemade Reese’s Cups Recipe easy for beginners?
Yes! This recipe is straightforward and perfect for beginners. The steps are simple, making it an enjoyable experience even if you’re new to candy making.
Final Thoughts
This homemade Reese’s cups recipe is a delightful treat that combines creamy peanut butter with rich chocolate, perfect for satisfying your sweet tooth. The simplicity of this recipe allows you to customize it easily—whether by adding your favorite toppings or swapping out ingredients. We encourage you to try making these delicious treats at home!
Homemade Reese’s Cups
Indulge in a sweet nostalgia with this Homemade Reese’s Cups Recipe, where creamy peanut butter meets rich chocolate for a delectable treat. Perfect for any occasion, these delightful bites are simple to make and endlessly customizable—ideal for birthdays, movie nights, or just satisfying your sweet cravings. With only a handful of ingredients and straightforward steps, you’ll find yourself making these irresistible cups time and again. Elevate your treats by adding toppings like sea salt or crushed nuts for an extra special touch.
- Prep Time: 20 minutes
- Cook Time: 10 minutes
- Total Time: 30 minutes
- Yield: Approximately 12 servings 1x
- Category: Dessert
- Method: No-bake
- Cuisine: American
Ingredients
- 14 ounces semi-sweet chocolate chips, divided
- 1 cup creamy peanut butter
- 6 tablespoons powdered sugar
- 4 tablespoons butter, softened
Instructions
- Melt half of the chocolate chips in a microwave-safe bowl at 30-second intervals until smooth.
- Spoon about ½ tablespoon of melted chocolate into cupcake liners placed in a muffin tin and shake gently to spread evenly.
- Freeze for about 15 minutes until set.
- In a mixing bowl, beat together peanut butter, powdered sugar, and softened butter until creamy.
- Add 1 tablespoon of the peanut butter mixture on top of each chocolate base and freeze for another 5 minutes.
- Melt the remaining chocolate chips and cover each peanut butter layer completely before freezing again for 10-15 minutes until fully set.
- Carefully remove from liners and enjoy!
Nutrition
- Serving Size: 1 cup (36g)
- Calories: 180
- Sugar: 9g
- Sodium: 60mg
- Fat: 12g
- Saturated Fat: 5g
- Unsaturated Fat: 6g
- Trans Fat: 0g
- Carbohydrates: 18g
- Fiber: 1g
- Protein: 3g
- Cholesterol: 10mg
Leave a Comment