
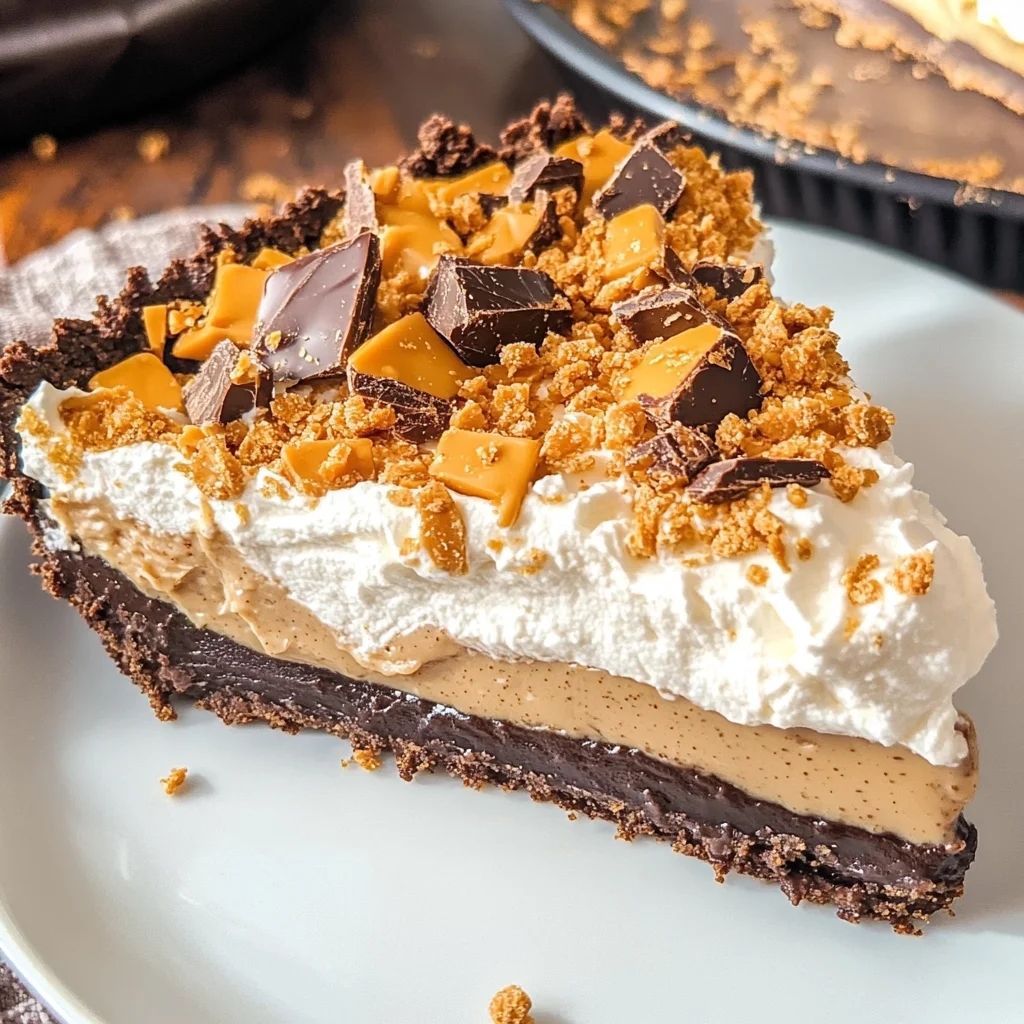
This cool and creamy Butterfinger Pie is the stuff dreams are made of. It’s a no-bake dessert that’s incredibly easy to make, perfect for any occasion. Whether you’re celebrating a birthday, hosting a barbecue, or simply satisfying a sweet tooth, this pie will impress everyone. Its rich flavor and delightful crunch from the Butterfinger bars set it apart from traditional desserts.
Why You’ll Love This Recipe
- No-Bake Convenience: You can whip this delicious pie up in just 15 minutes, making it ideal for last-minute gatherings.
- Irresistible Flavor: The combination of cream cheese and peanut butter creates a creamy filling that pairs perfectly with the crunch of Butterfinger bars.
- Versatile Dessert: Perfect for summer picnics or holiday parties, this Butterfinger Pie suits any occasion.
- Kid-Friendly Fun: Kids love helping crush the Butterfinger bars and decorating the pie!
- Make Ahead Friendly: Prepare it in advance and let it chill in the fridge—just slice and serve when you’re ready.
Tools and Preparation
To make your Butterfinger Pie, gather the necessary tools. Having the right equipment will ensure a smooth preparation process.
Essential Tools and Equipment
- Electric mixer
- Large mixing bowl
- Rubber spatula
- Measuring cups and spoons
- Pie dish
Importance of Each Tool
- Electric mixer: This tool helps achieve a smooth filling without lumps, saving time and effort.
- Rubber spatula: Useful for folding ingredients together without deflating the mixture.
- Measuring cups and spoons: Accurate measurements are crucial for achieving the perfect flavor balance.
Ingredients
Gather these ingredients to create your delicious Butterfinger Pie:
For the Filling
- 1 (8-ounce) package cream cheese (room temperature)
- 1/2 cup creamy peanut butter
- 2 teaspoons vanilla extract
- 1 1/2 cups powdered sugar
- 1 (12.5-ounce) bag fun-sized butterfinger bars (crushed; reserve 2 bars to sprinkle on top)
- 1 (8-ounce) container Cool Whip (thawed)
For the Crust
- 1 store-bought oreo or chocolate graham cracker crust
How to Make Butterfinger Pie
Step 1: Mix Cream Cheese and Peanut Butter
Place cream cheese and peanut butter in a large mixing bowl. Add vanilla extract, then beat with an electric mixer until smooth.
Step 2: Add Powdered Sugar
Beat in powdered sugar until fully incorporated, creating a creamy texture.
Step 3: Fold in Crushed Butterfingers
Gently fold in the crushed Butterfinger bars, ensuring they’re evenly distributed throughout the mixture.
Step 4: Incorporate Cool Whip
Carefully fold in the thawed Cool Whip until well combined, creating a light and fluffy filling.
Step 5: Assemble the Pie
Spread the filling into your prepared crust. Sprinkle reserved crushed Butterfinger bars on top for added texture.
Step 6: Chill Before Serving
Refrigerate your Butterfinger Pie for at least 4 hours before serving to allow it to set properly. Enjoy!
How to Serve Butterfinger Pie
Butterfinger Pie is a delightful dessert that can be enjoyed in various ways. Here are some creative serving suggestions to make your dessert experience even more enjoyable.
Individual Portions
- Use small cups or jars to serve individual portions of Butterfinger Pie. This allows guests to enjoy their own serving while keeping things neat and tidy.
Toppings Galore
- Offer a variety of toppings such as whipped cream, chocolate syrup, or extra crushed Butterfinger bars for added texture and flavor.
Ice Cream Pairing
- Serve slices of Butterfinger Pie alongside a scoop of vanilla or chocolate ice cream. The combination of creamy pie and cold ice cream is simply irresistible.
Festive Presentation
- Garnish the pie with fresh mint leaves or edible flowers for a beautiful presentation that enhances the visual appeal of your dessert.
Drizzle with Caramel Sauce
- A drizzle of warm caramel sauce over each slice adds an extra layer of sweetness and complements the flavors perfectly.
Coffee Companion
- Pair Butterfinger Pie with a cup of coffee or espresso for an adult twist, balancing the sweetness of the pie with a rich, bitter drink.
How to Perfect Butterfinger Pie
To ensure your Butterfinger Pie turns out perfectly every time, consider the following helpful tips.
- Use Room Temperature Ingredients: Make sure your cream cheese is at room temperature. This helps create a smooth filling without lumps.
- Crush Butterfingers Finely: For an even distribution in the pie, crush the Butterfinger bars into fine pieces but leave some larger chunks for texture.
- Chill Long Enough: Allow the pie to chill in the refrigerator for at least 4 hours. This helps it set properly and improves flavor.
- Experiment with Crusts: While an Oreo crust is classic, feel free to try graham cracker or even cookie crusts for different flavor profiles.
- Add More Peanut Butter: If you love peanut butter, feel free to increase the amount for a richer taste that complements the Butterfingers.
- Serve Cold: Always serve this pie cold for the best texture and flavor experience. It’s meant to be refreshing!
Best Side Dishes for Butterfinger Pie
Pairing side dishes with your Butterfinger Pie can enhance your meal experience. Here are some delicious options that complement this sweet treat perfectly.
- Fresh Fruit Salad: A light and refreshing fruit salad provides a contrast to the richness of the pie. Consider berries, melons, and citrus fruits.
- Chocolate Chip Cookies: Classic chocolate chip cookies add an extra touch of sweetness and are always a crowd-pleaser alongside dessert.
- Vanilla Ice Cream: A scoop of vanilla ice cream balances out the flavors and offers a cool complement to your pie.
- Whipped Cream: Lightly sweetened whipped cream serves as an excellent topping that enhances both presentation and taste.
- Cheesecake Bites: Mini cheesecake bites are rich yet small enough not to overpower the main dessert, providing a lovely variety.
- Coffee or Espresso: A cup of brewed coffee or espresso pairs beautifully, cutting through the sweetness while adding warmth.
- Mini Brownies: Fudgy mini brownies add another layer of decadence without being too filling when served alongside butterfinger pie.
- Chocolate Fondue: Set up a chocolate fondue station where guests can dip fruits or marshmallows for an interactive dessert experience.
Common Mistakes to Avoid
Making Butterfinger Pie is simple, but there are pitfalls to watch out for. Here are some common mistakes to avoid.
- Skipping the room temperature cream cheese: Using cold cream cheese can lead to a lumpy filling. Always let it sit at room temperature for a while before mixing.
- Not measuring ingredients correctly: Accurate measurements are key for the perfect texture and taste. Use proper measuring cups and spoons for dry and wet ingredients.
- Overmixing the filling: While it’s important to combine ingredients well, overmixing can make the pie dense. Mix just until combined for a light and airy filling.
- Forgetting to reserve toppings: Setting aside some crushed Butterfinger bars for topping adds a nice finishing touch. Don’t forget this step for extra flavor and crunch!
- Neglecting refrigeration time: This pie needs at least 4 hours in the fridge to set properly. Be patient and don’t rush this crucial step!
Storage & Reheating Instructions
Refrigerator Storage
- Store any leftover Butterfinger Pie in an airtight container.
- It will stay fresh in the refrigerator for up to 3 days.
Freezing Butterfinger Pie
- Wrap the pie tightly in plastic wrap or foil before placing it in a freezer-safe container.
- You can freeze it for up to 2 months. Be sure to label it with the date!
Reheating Butterfinger Pie
- Oven: Preheat your oven to 350°F (175°C). Place slices on a baking tray covered with foil for about 10 minutes until slightly warm.
- Microwave: Heat individual slices on medium power for about 15-20 seconds or until warm. Be careful not to overheat!
- Stovetop: Place slices in a non-stick skillet over low heat, cover, and warm for about 5 minutes.
Frequently Asked Questions
Here are some common questions about making Butterfinger Pie.
Can I use crunchy peanut butter instead of creamy?
Yes, using crunchy peanut butter will add extra texture but may change the creaminess of the filling.
How can I make this Butterfinger Pie gluten-free?
Opt for a gluten-free crust, like almond flour or gluten-free chocolate cookie crusts, which will work perfectly with the pie’s filling.
What other toppings can I add?
You can customize your Butterfinger Pie by adding whipped cream, chocolate sauce, or even crushed nuts on top for added flavor.
How long does Butterfinger Pie last?
In the refrigerator, it lasts around 3 days, but you can freeze it for up to 2 months if properly stored.
Can I make this pie ahead of time?
Absolutely! This no-bake dessert is perfect for making ahead of time. Just ensure you refrigerate it long enough before serving.
Final Thoughts
This creamy Butterfinger Pie is a delightful treat that everyone will love. It’s easy to make and perfect for parties or family gatherings. Feel free to customize it with your favorite toppings or mix-ins! Give it a try; you won’t be disappointed!
Butterfinger Pie

Indulge in the dreamy delight of Butterfinger Pie, a no-bake dessert that combines a rich, creamy filling with the irresistible crunch of Butterfinger bars. This easy-to-make pie is perfect for any occasion—from birthday celebrations to summer barbecues—and is sure to impress your guests. With just a few simple ingredients and minimal prep time, you can whip up a dessert that offers both flavor and nostalgia. Enjoy it chilled for the ultimate refreshing treat that satisfies any sweet tooth!
- Prep Time: 15 minutes
- Cook Time: None
- Total Time: 0 hours
- Yield: Approximately 8 servings 1x
- Category: Dessert
- Method: No-Bake
- Cuisine: American
Ingredients
- 1 (8-ounce) package cream cheese (room temperature)
- 1/2 cup creamy peanut butter
- 2 teaspoons vanilla extract
- 1 1/2 cups powdered sugar
- 1 (12.5-ounce) bag fun-sized Butterfinger bars (crushed; reserve 2 bars for topping)
- 1 (8-ounce) container Cool Whip (thawed)
- 1 store-bought Oreo or chocolate graham cracker crust
Instructions
- In a large mixing bowl, combine cream cheese and peanut butter. Add vanilla extract and beat with an electric mixer until smooth.
- Gradually mix in powdered sugar until fully incorporated.
- Gently fold in crushed Butterfinger bars, ensuring even distribution.
- Carefully fold in thawed Cool Whip until well combined and fluffy.
- Spread the filling into the prepared crust and sprinkle reserved Butterfinger bars on top.
- Refrigerate for at least 4 hours before serving to allow it to set completely.
Nutrition
- Serving Size: 1 serving
- Calories: 360
- Sugar: 30g
- Sodium: 210mg
- Fat: 22g
- Saturated Fat: 9g
- Unsaturated Fat: 11g
- Trans Fat: 0g
- Carbohydrates: 36g
- Fiber: 1g
- Protein: 6g
- Cholesterol: 30mg
Leave a Comment