
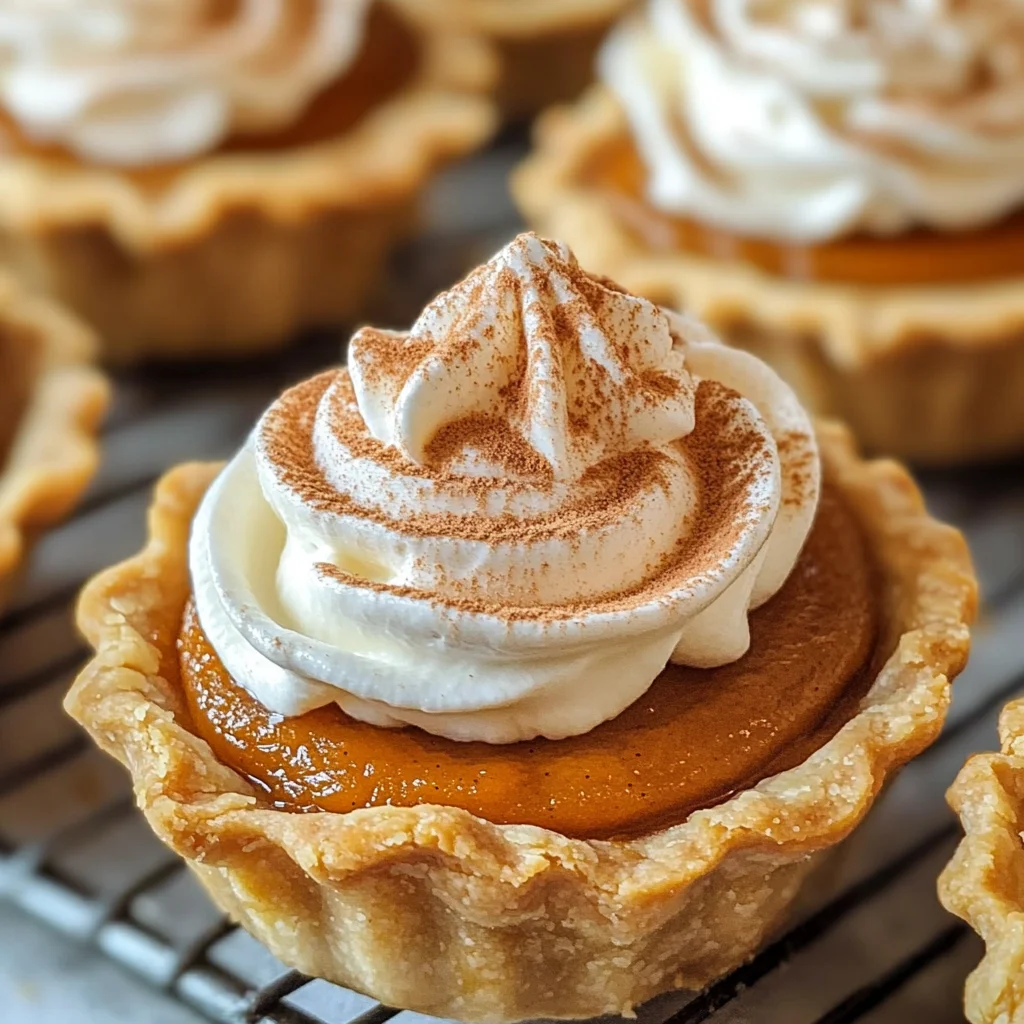
These Mini Pumpkin Pies capture the delightful essence of traditional pumpkin pie in a charming, bite-sized format. Perfect for fall gatherings, holiday parties, or a cozy night in, these mini treats are easy to make and even easier to enjoy. Their individual servings make them a hit with both kids and adults alike, offering a delicious way to share the flavors of autumn.
Why You’ll Love This Recipe
- Easy to Make: With simple ingredients and straightforward steps, this recipe is perfect for bakers of all skill levels.
- Perfect Portions: Individual servings mean everyone can enjoy their own mini pumpkin pie without the fuss of slicing.
- Versatile Serving Options: Serve chilled or at room temperature, plain or topped with homemade whipped cream for added indulgence.
- Great for Any Occasion: Whether it’s Thanksgiving, a potluck, or just a sweet treat at home, these pies fit right in.
- Flavorful and Festive: Each bite bursts with the warm spices and creamy texture that make pumpkin pie a classic favorite.
Tools and Preparation
Before you start making your mini pumpkin pies, gather your essential tools. Having everything ready will make the process smooth and enjoyable.
Essential Tools and Equipment
- Muffin pans (12-count)
- Cookie cutter (3 1/2-inch)
- Mixing bowl
- Whisk
Importance of Each Tool
- Muffin pans: These are crucial for creating the perfect shape and size for your mini pumpkin pies.
- Cookie cutter: A sharp cookie cutter ensures clean edges on your pie crust circles for an appealing presentation.
- Mixing bowl: A good mixing bowl allows you to easily combine ingredients without spills.
- Whisk: A whisk helps achieve a smooth filling by thoroughly blending all components.
Ingredients
These Mini Pumpkin Pies have the flavors of traditional pumpkin pie, but in mini form and individual servings. The perfect bite and so easy!
Ingredients:
– 2 9-inch unbaked pie crusts (homemade or store bought)
– 1/3 cup brown sugar
– 2 tablespoons granulated sugar
– 1 1/2 teaspoons pumpkin pie spice
– 1/4 teaspoon salt
– 1 cup canned pumpkin puree (not pumpkin pie filling)
– 3/4 cup evaporated milk
– 1 large egg (lightly beaten)
– 1/2 teaspoon vanilla extract
– Homemade whipped cream (for topping)
How to Make Mini Pumpkin Pies
Step 1: Preheat the Oven
Preheat your oven to 400 degrees F. This step is essential for achieving that perfect golden brown crust.
Step 2: Prepare the Pie Crusts
On a lightly floured surface:
1. Roll out the pie crusts to about 1/8-inch thickness.
2. Using a 3 1/2-inch cookie cutter (or cup), cut out 18 circles from the pie crusts.
3. Re-roll any scraps if necessary to cut out more circles.
Step 3: Fit Pie Crusts into Muffin Pans
- Place each circle of pie crust into each slot of two standard muffin pans (12-count).
- Gently press down the dough around the sides so it fits snugly in each cavity.
- Transfer the muffin pans to the refrigerator while preparing the filling.
Step 4: Make the Filling
In a mixing bowl:
1. Whisk together the brown sugar, granulated sugar, pumpkin pie spice, and salt until well combined.
2. Add in the canned pumpkin puree, evaporated milk, egg, and vanilla extract; whisk until fully combined.
Step 5: Fill Pie Crusts
Remove muffin pans from refrigerator:
1. Evenly distribute about 2 tablespoons of pumpkin pie filling into each prepared crust.
Step 6: Bake
Bake in preheated oven for about:
– 16–20 minutes, or until tops are set and crust is lightly golden brown.
– Keep an eye on them so they don’t burn.
Step 7: Cool Down
After baking:
1. Remove from oven and let cool on a wire rack for about 30 minutes.
2. Carefully remove mini pies from muffin pans onto wire racks to cool completely.
Step 8: Chill Before Serving
Once cooled:
1. Place pies in an airtight container and refrigerate for at least three hours or overnight before serving.
Step 9: Serve
When ready to serve:
– Carefully remove from pans. Enjoy them chilled or at room temperature, plain or topped with homemade whipped cream!
How to Serve Mini Pumpkin Pies
Mini Pumpkin Pies are versatile and can be served in many delightful ways. Whether you’re hosting a gathering or enjoying a quiet dessert at home, these serving suggestions will enhance your experience.
With Whipped Cream
- Top each mini pumpkin pie with a dollop of homemade whipped cream for an extra creamy texture.
A Side of Ice Cream
- Pair the pies with a scoop of vanilla ice cream; the cold complements the warm spices perfectly.
Drizzle of Caramel Sauce
- Add a drizzle of caramel sauce over the top for added sweetness and richness.
Fresh Fruit Garnish
- Serve with slices of fresh apples or pears for a refreshing contrast to the spiced filling.
Coffee Pairing
- Enjoy your mini pumpkin pies with a cup of spiced coffee to echo the flavors in the dessert.
Festive Platter
- Arrange several mini pumpkin pies on a decorative platter with seasonal decorations for an eye-catching presentation.
How to Perfect Mini Pumpkin Pies
Creating perfect Mini Pumpkin Pies requires attention to detail. Here are some tips to ensure your pies turn out delicious every time.
- Use fresh ingredients: Always opt for fresh pumpkin puree instead of canned, if possible, for better flavor.
- Chill your dough: Chilling the pie crust before baking helps it maintain shape and texture.
- Don’t overfill: Fill each crust only about two-thirds full to prevent spilling during baking.
- Watch the baking time: Keep an eye on them towards the end of baking to avoid burning; they should be golden brown.
- Cool properly: Allow them to cool completely before serving; this helps set the filling.
- Store correctly: Keep leftovers in an airtight container in the fridge to maintain freshness.
Best Side Dishes for Mini Pumpkin Pies
Pairing side dishes with Mini Pumpkin Pies can elevate your dessert experience. Here are some great options:
- Roasted Vegetables: Seasonal roasted veggies like carrots and Brussels sprouts provide a savory balance.
- Cheese Platter: A selection of cheeses, such as brie or sharp cheddar, pairs well with sweet desserts.
- Spiced Nuts: Consider offering spiced pecans or walnuts for a crunchy texture that complements the filling.
- Green Salad: A light salad with vinaigrette can cleanse the palate between bites of rich pie.
- Bread Rolls: Soft rolls serve as a comforting side that balances sweetness with their fluffy texture.
- Pumpkin Soup: For those who love pumpkin, serving a small cup of pumpkin soup adds to the theme!
- Candied Yams: Sweet potatoes glazed in syrup can add another layer of flavor that’s perfect for fall gatherings.
- Herb-Infused Rice: A simple herb rice can create a nice contrast without overpowering the desserts.
Common Mistakes to Avoid
Making Mini Pumpkin Pies can be simple, but it’s easy to make mistakes. Here are some common pitfalls and how to avoid them.
- Skipping the chilling step – Not refrigerating the pie crust before adding the filling can lead to soggy bottoms. Always chill your crust for at least 30 minutes.
- Using pumpkin pie filling instead of puree – Pumpkin pie filling contains added sugars and spices that alter the taste. Always use pure canned pumpkin puree for the best flavor.
- Overfilling the crusts – Filling each pie crust too much can cause spills during baking. Stick to about 2 tablespoons of filling per crust for perfect mini pies.
- Not preheating the oven – Baking in a cold oven can result in uneven cooking. Always preheat your oven to ensure even baking and a perfectly golden crust.
- Ignoring baking time – Each oven is different, so it’s crucial to check your pies a few minutes before the suggested baking time. Watch for a set filling and golden edges.
Storage & Reheating Instructions
Refrigerator Storage
- Storage duration – Mini Pumpkin Pies can be stored in the refrigerator for up to 4 days.
- Containers – Use an airtight container to prevent them from drying out or absorbing other odors.
Freezing Mini Pumpkin Pies
- Freezing duration – These pies can be frozen for up to 3 months.
- Containers – Wrap each mini pie tightly in plastic wrap and place them in a freezer-safe bag or container.
Reheating Mini Pumpkin Pies
- Oven – Preheat your oven to 350°F (175°C) and reheat the pies for about 10-15 minutes until warm.
- Microwave – Heat each mini pie on high for about 20-30 seconds. Be cautious not to overheat, as this can make them rubbery.
- Stovetop – Place a mini pie in a skillet over low heat, covering it with a lid. Heat for about 5 minutes until warmed through.
Frequently Asked Questions
Here are some common questions about making Mini Pumpkin Pies.
Can I use fresh pumpkin instead of canned?
Yes, you can use fresh pumpkin! Just cook and puree it until smooth, ensuring it has enough moisture similar to canned puree.
How do I know when my mini pumpkin pies are done?
Your pies are ready when the filling is set, and the edges of the crust are lightly golden brown.
Can I make these mini pumpkin pies ahead of time?
Absolutely! You can prepare them a day in advance and store them in the refrigerator or freeze them for longer storage.
What variations can I try with this mini pumpkin pie recipe?
Feel free to add chocolate chips, nuts, or caramel sauce for unique flavors. You can also experiment with different spices!
Are there any gluten-free options for mini pumpkin pies?
Yes! You can substitute regular pie crust with gluten-free options available at most grocery stores for a delicious gluten-free treat.
Final Thoughts
These Mini Pumpkin Pies are not only adorable but also packed with flavor that everyone will love. They’re perfect for gatherings or simply enjoying at home. Plus, you can customize them with toppings or fillings of your choice! Give this recipe a try and experience the delightful taste of fall in every bite.
Mini Pumpkin Pies

Delight in the flavors of autumn with these Mini Pumpkin Pies, a charming twist on the classic dessert. Each bite-sized treat offers a perfectly spiced filling nestled in a flaky homemade or store-bought crust, making them ideal for holiday gatherings or cozy evenings at home. With their individual portions, everyone can enjoy their own pie without the hassle of slicing. These delightful mini desserts are versatile enough to be served chilled or at room temperature, and they shine when topped with homemade whipped cream or a drizzle of caramel sauce. Easy to make and absolutely delicious, these Mini Pumpkin Pies will quickly become a favorite during the fall season.
- Prep Time: 20 minutes
- Cook Time: 20 minutes
- Total Time: 40 minutes
- Yield: Approximately 12 servings 1x
- Category: Dessert
- Method: Baking
- Cuisine: American
Ingredients
- 2 unbaked pie crusts (9-inch)
- 1/3 cup brown sugar
- 2 tablespoons granulated sugar
- 1 ½ teaspoons pumpkin pie spice
- 1/4 teaspoon salt
- 1 cup canned pumpkin puree
- 3/4 cup evaporated milk
- 1 large egg, beaten
- 1/2 teaspoon vanilla extract
Instructions
- Preheat your oven to 400°F (200°C).
- Roll out the pie crusts on a floured surface and cut out circles using a cookie cutter.
- Fit each crust circle into muffin pan slots and refrigerate while preparing the filling.
- In a mixing bowl, whisk together sugars, spices, salt, pumpkin puree, evaporated milk, egg, and vanilla until smooth.
- Fill each crust with approximately 2 tablespoons of the pumpkin mixture.
- Bake for 16-20 minutes until the tops are set and edges are lightly golden.
- Allow to cool on wire racks for at least 30 minutes before transferring to an airtight container in the fridge.
Nutrition
- Serving Size: 1 serving
- Calories: 150
- Sugar: 10g
- Sodium: 75mg
- Fat: 7g
- Saturated Fat: 2g
- Unsaturated Fat: 4g
- Trans Fat: 0g
- Carbohydrates: 19g
- Fiber: 1g
- Protein: 2g
- Cholesterol: 20mg
Leave a Comment